Backyard Concrete Pathway A DIY Guide
Backyard concrete pathways: Transform your outdoor space with a durable and stylish pathway! This guide walks you through everything from initial design and material selection to construction, maintenance, and creative design ideas. We’ll cover budgeting, different concrete finishes, and even how to add those finishing touches to make your pathway pop.
Whether you’re a seasoned DIYer or a complete beginner, we’ll equip you with the knowledge and steps to successfully build a beautiful, functional backyard pathway that will enhance your outdoor living for years to come. Get ready to get your hands dirty and create a pathway you’ll be proud of!
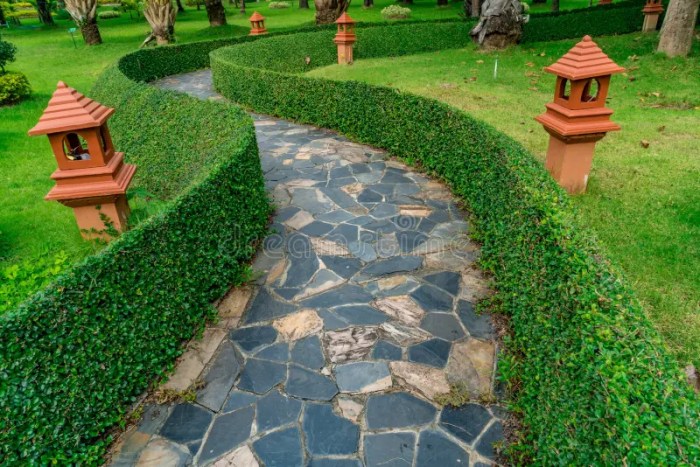
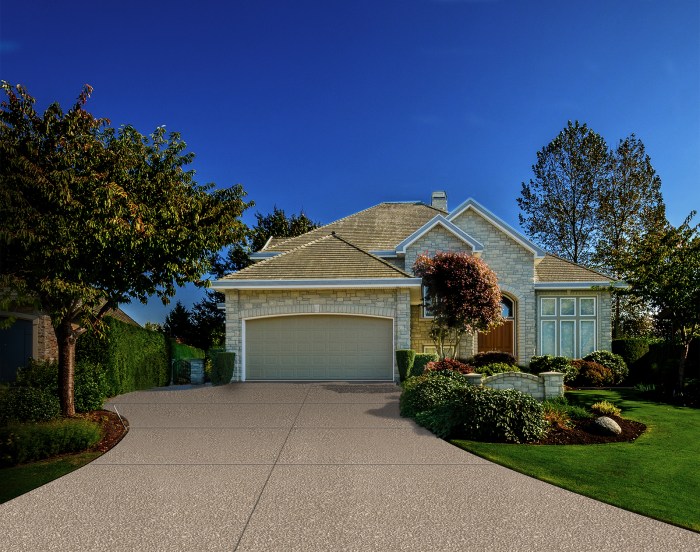
Design Considerations for Backyard Concrete Pathways
Source: alamy.com
Creating a concrete pathway in your backyard adds both functionality and aesthetic appeal. Careful planning ensures a pathway that complements your landscape and stands the test of time. This section will cover key design considerations to help you create the perfect pathway.
Pathway Styles for Different Backyard Layouts, Backyard concrete pathway
The style of your pathway should complement the overall design of your backyard. Consider the size of your yard, the existing landscaping, and your personal preferences. A winding path suits larger yards, while a straight path is ideal for smaller spaces. Below are some examples:
| Width (ft) | Material | Aesthetic | Suitable for |
|---|---|---|---|
| 3-4 | Standard Concrete | Clean, Modern | Small to medium yards, straight paths |
| 2-3 | Exposed Aggregate Concrete | Natural, Textured | Gardens, areas with natural landscaping |
| 4-5 | Stamped Concrete (Brick Pattern) | Traditional, Elegant | Larger yards, formal gardens |
| Variable (2-4) | Concrete Pavers | Versatile, Customizable | Any yard size allows for curves and intricate designs |
Integrating Pathway Design with Existing Landscaping
Successfully integrating your pathway requires considering existing features. A pathway should enhance, not detract from, your existing plants, trees, and other landscaping elements. For example, avoid placing a pathway directly over the roots of mature trees, as this can damage them. Instead, curve the pathway around significant plants, creating a natural flow. Consider using plants to define the edges of the pathway, creating a visually appealing border. Think of the pathway as a natural extension of your garden, not a separate entity.
Drainage and Slope Considerations in Pathway Design
Proper drainage is crucial to prevent water accumulation and erosion. A slight slope (around 1-2%) should be incorporated into the pathway design to allow water to drain away from the house and other structures. This prevents water from pooling on the surface, which can lead to cracking and damage over time. Consider the natural drainage patterns of your yard when designing the pathway. Installing drainage systems, such as French drains, can be necessary in areas with poor drainage. A properly sloped pathway minimizes the need for extensive drainage solutions.
Comparison of Concrete Finishes for Backyard Pathways
The choice of concrete finish significantly impacts the pathway’s appearance and durability. Each finish offers a unique look and feel, suitable for different styles and purposes.
| Finish | Appearance | Durability | Suitability for Backyard Pathways |
|---|---|---|---|
| Smooth | Clean, Minimalist | Moderate (prone to staining and slipping) | Suitable for modern designs, but requires regular cleaning |
| Textured | Rough, Non-Slip | High (resistant to slipping and wear) | Ideal for high-traffic areas and sloped pathways |
| Stamped | Variety of patterns (brick, stone, etc.) | High (durable and visually appealing) | Versatile, suits various styles, and adds visual interest |
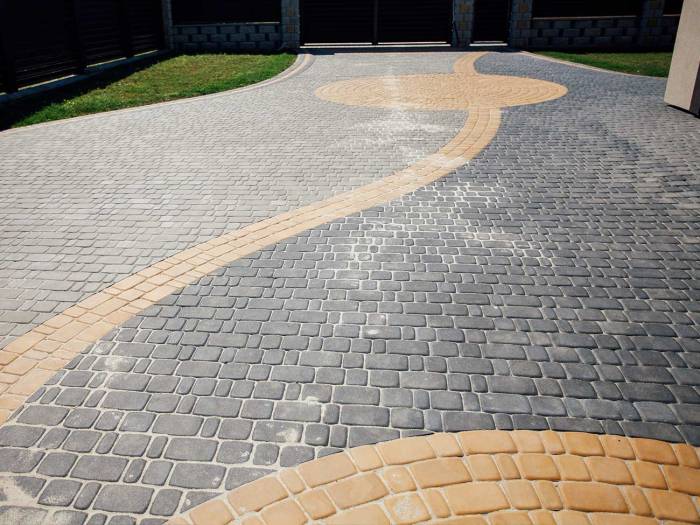
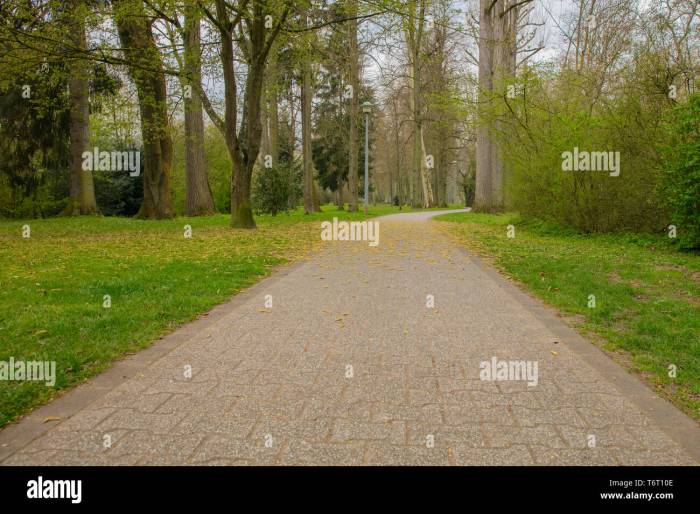
Materials and Costs Associated with Backyard Concrete Pathways
Source: com.au
Building a concrete pathway involves several material and labor costs. The total expense will depend on the pathway’s size, design complexity, and your chosen materials. Understanding these costs upfront helps you budget effectively and avoid unexpected expenses. We’ll break down the costs associated with a typical backyard project.
Concrete Mixes and Their Properties
Different concrete mixes offer varying strengths and aesthetics. The choice depends on your pathway’s intended use and the desired look. A stronger mix is necessary for high-traffic areas, while a more decorative mix might be suitable for a less-used path.
| Concrete Mix | Cement (bags per cubic yard) | Aggregate Type | Strength (psi) | Suitability for Pathways |
|---|---|---|---|---|
| Standard Mix | 6 | Sand and Gravel | 3000-4000 | Suitable for most residential pathways with moderate foot traffic. |
| High-Strength Mix | 8-10 | Crushed Stone | 5000+ | Ideal for high-traffic areas or pathways supporting heavier loads. |
| Decorative Mix | Variable | Colored aggregates, exposed aggregate | 3000-4000 | Provides aesthetic appeal, but strength might be slightly lower depending on the aggregate type. |
Cost Breakdown per Square Foot
The cost of materials varies by location and supplier. These figures are estimates and should be verified with local suppliers. Labor costs are also highly variable, depending on location and contractor experience. Permit costs also vary significantly depending on local regulations.
| Pathway Design | Cement (per sq ft) | Aggregates (per sq ft) | Labor (per sq ft) | Permits (per sq ft) | Total Estimated Cost (per sq ft) |
|---|---|---|---|---|---|
| Simple, 4-inch thick pathway | $1.50 – $2.50 | $0.50 – $1.00 | $5.00 – $10.00 | $0.50 – $2.00 | $7.50 – $15.50 |
| Decorative pathway with colored aggregates, 4-inch thick | $2.00 – $3.50 | $1.00 – $2.00 | $7.00 – $12.00 | $0.50 – $2.00 | $10.50 – $18.50 |
| Complex design with curves and patterns, 4-inch thick | $2.50 – $4.00 | $1.50 – $2.50 | $8.00 – $15.00 | $0.50 – $2.00 | $12.50 – $24.00 |
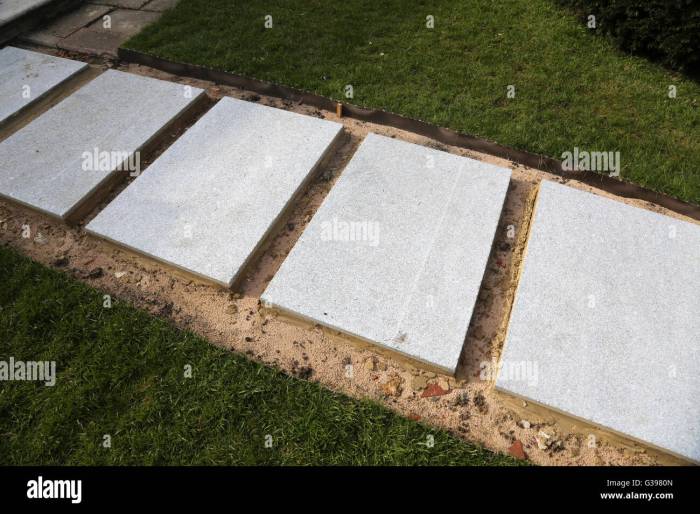
Poured Concrete vs. Pre-cast Slabs
Poured concrete offers design flexibility, allowing for custom shapes and curves. Pre-cast slabs are quicker to install, requiring less labor but limiting design options. The cost-effectiveness depends on the project’s scale and complexity. For small, simple pathways, pre-cast slabs might be cheaper. Larger or more intricate pathways often benefit from the cost-effectiveness of poured concrete due to the reduced labor costs per square foot despite higher initial material costs. For example, a large, curved pathway would be significantly more expensive with pre-cast slabs due to the need for cutting and fitting numerous individual pieces.
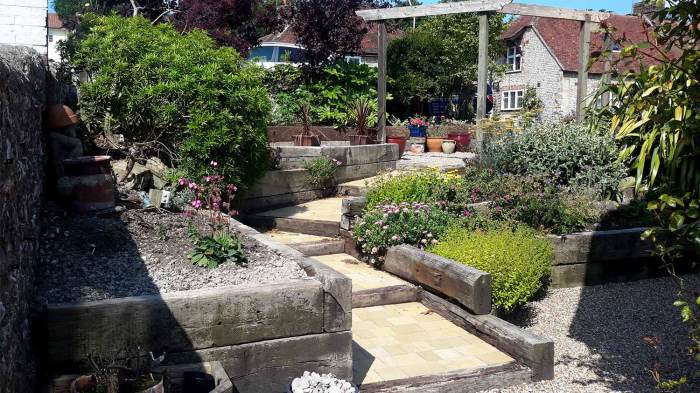
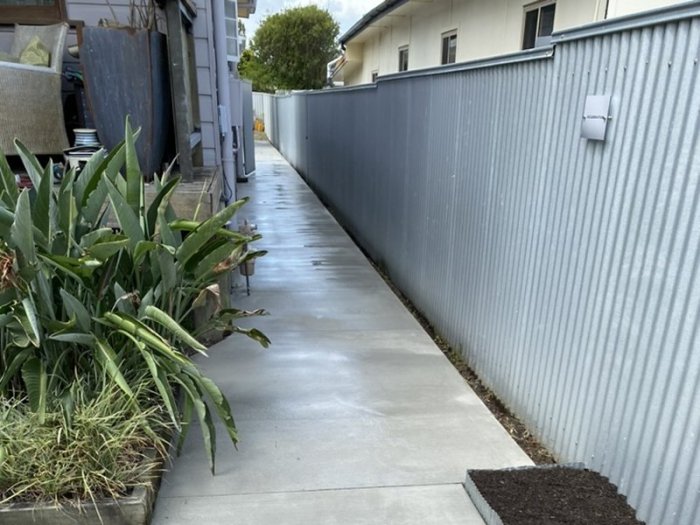
Construction and Installation of Backyard Concrete Pathways

Source: vecteezy.com
Building a concrete pathway is a rewarding DIY project that can significantly enhance your backyard’s aesthetic appeal and functionality. This process involves several key steps, from initial preparation to the final finishing touches. Careful planning and execution are crucial for a durable and attractive pathway.
The construction of a concrete pathway is a multi-stage process requiring careful planning and execution. Success hinges on proper excavation, formwork construction, and concrete pouring techniques. Paying attention to detail in each step will ensure a long-lasting and aesthetically pleasing result.
Excavation and Formwork
Excavation involves digging a trench to the desired depth and width of your pathway. The depth should accommodate the concrete thickness (typically 4-6 inches) plus a compacted gravel base (about 2-4 inches). Accurate measurements are essential for a level pathway. After excavation, compact the gravel base thoroughly to prevent settling. Formwork, usually made of wood planks or metal edging, creates the pathway’s boundaries and ensures the concrete maintains its shape during pouring and setting. Ensure the formwork is level and securely staked to prevent movement. Stakes should be placed every 2-3 feet along the formwork. For curves, use flexible formwork materials or create a series of short, straight sections.
Concrete Pouring and Leveling
Once the formwork is in place, the concrete can be poured. This is best done in sections to allow for efficient leveling and consolidation. Use a wheelbarrow or concrete pump to transport the concrete to the pathway. For a smooth surface, use a bull float to level the concrete immediately after pouring. This tool spreads the concrete evenly and removes excess water. After the initial leveling, use a hand float or magnesium float for a smoother finish. For particularly large areas, consider using a power screed for efficient leveling. Work in sections, ensuring each section is level before moving to the next. A long, straight 2×4 can be used as a guide to check the levelness.
Creating Decorative Patterns and Textures
Numerous techniques exist for adding visual interest to your concrete pathway. For example, a broom finish can be achieved by sweeping the concrete surface with a stiff-bristled broom shortly after floating. This creates a textured, non-slip surface. Using stamps or stencils allows for the creation of repeating patterns. These tools are pressed into the concrete before they are set, leaving an imprinted design. Another option is to embed decorative elements like stones, glass, or tiles into the wet concrete. These should be slightly pressed into the surface to ensure they are securely embedded. Remember to plan your design before pouring the concrete to ensure the timing is correct for applying any decorative techniques.
Concrete Curing
Proper curing is essential for the concrete’s strength and durability. This process involves maintaining the concrete’s moisture content for several days to allow it to properly hydrate.
- Keep it Moist: Cover the concrete with plastic sheeting or burlap to prevent rapid water evaporation. Keep the covering moist by regularly spraying it with water.
- Prevent Cracking: Avoid heavy traffic or direct sunlight on the concrete during the curing period.
- Consistent Moisture: Curing should typically last for at least 7 days, but longer is better, especially in hot and dry climates.
- Remove Forms: Remove the formwork after the concrete has sufficiently cured, usually after a few days. This prevents staining or damage to the concrete.
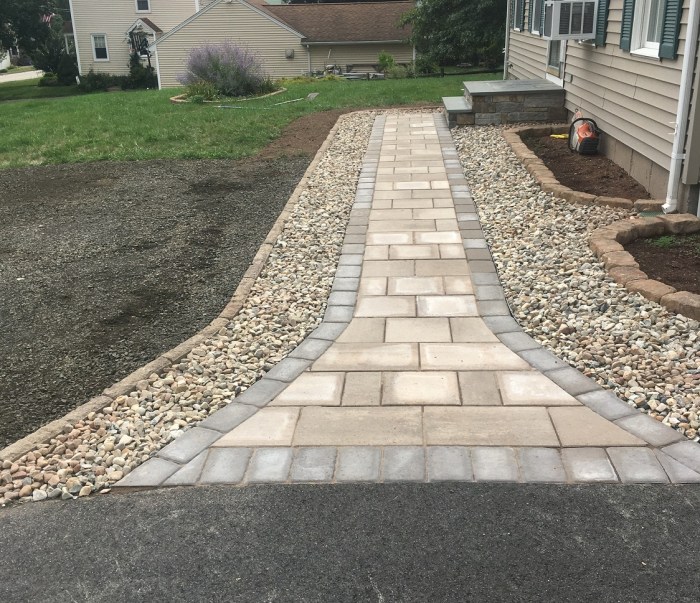
Maintenance and Repair of Backyard Concrete Pathways
Source: alamy.com
A little preventative maintenance goes a long way in extending the life of your beautiful concrete pathway. Regular care will help prevent costly repairs down the line and keep your pathway looking its best for years to come. This section Artikels a maintenance schedule and addresses common problems, providing solutions for keeping your pathway in top condition.
Concrete Pathway Maintenance Schedule
A proactive approach to maintenance is key. This schedule provides a guideline; adjust the frequency based on your climate and pathway usage.
| Task | Frequency | Details |
|---|---|---|
| Cleaning | Monthly (or as needed) | Sweep or blow away leaves, dirt, and debris. Use a stiff brush and mild detergent solution for stubborn stains. Rinse thoroughly with water. |
| Weed Removal | As needed | Remove weeds promptly to prevent root damage to the concrete. Use a weeding tool or herbicide, being careful not to damage the surrounding plants. |
| Sealing | Every 2-3 years | Apply a concrete sealer to protect against water damage, staining, and weathering. Follow the manufacturer’s instructions carefully. Consider a higher-quality sealer in harsh climates. |
| Crack Repair (Minor) | As needed | Repair small cracks promptly to prevent them from worsening. Use a crack filler designed for concrete. |
| Inspection | Annually | Thoroughly inspect the pathway for cracks, staining, erosion, or other damage. Address any issues promptly. |
Common Concrete Pathway Problems and Solutions
Several issues can affect concrete pathways over time. Understanding these problems and their solutions allows for timely intervention and prevents further damage.
| Problem | Solution |
|---|---|
| Cracking | For minor cracks, use a high-quality concrete crack filler. Larger cracks may require professional repair, possibly involving sawing out the damaged section and replacing it with new concrete. |
| Staining | Regular cleaning can prevent many stains. For stubborn stains, try a pressure washer (use cautiously to avoid damaging the concrete) or a specialized concrete cleaner. Oil stains may require a degreaser. |
| Erosion | Erosion is often caused by water runoff. Ensure proper drainage around the pathway to prevent water accumulation. Consider adding a sealant to protect against water damage. |
| Spalling | Spalling (chipping or flaking of the concrete surface) is often caused by freeze-thaw cycles or chemical damage. Repair requires removing the damaged concrete and patching it with fresh concrete. |
| Discoloration | Discoloration can be due to various factors including algae growth, efflorescence (salt deposits), or staining. Cleaning and sealing can often resolve discoloration. For efflorescence, allow the deposits to dry and then brush them away. |
Minor Crack Repair Methods
Addressing small cracks promptly prevents them from becoming larger, more expensive problems.
For minor cracks, a simple and effective repair method involves cleaning the crack thoroughly, applying a concrete crack filler according to the manufacturer’s instructions, and smoothing the surface. Allow ample drying time before applying a sealant to protect the repair. Larger cracks may require more extensive repair methods, potentially involving the use of epoxy or a concrete patching compound. For significant damage, consulting a professional concrete contractor is advisable.
Preventing Common Concrete Pathway Issues
Preventative measures are more cost-effective than repairs. This table Artikels strategies and their effectiveness.
| Preventative Measure | Effectiveness |
|---|---|
| Proper Drainage | High – Prevents water accumulation, reducing erosion and cracking. |
| Regular Cleaning | High – Prevents staining and buildup of debris. |
| Sealing | High – Protects against water damage, staining, and weathering. |
| Weed Control | Medium – Prevents root damage that can lead to cracking. |
| Winter Protection (in cold climates) | High – Prevents freeze-thaw damage. This may involve covering the pathway with a tarp or using de-icing agents cautiously. |
Aesthetic Considerations and Design Ideas
Source: itch.zone
Creating a beautiful and functional backyard pathway involves more than just laying down concrete. Careful consideration of aesthetics, incorporating color, texture, and landscaping elements, will transform a simple walkway into a stunning feature of your outdoor space. The right design can enhance the overall beauty and usability of your yard.
Pathway Design Examples
Three distinct pathway designs can illustrate the versatility of concrete and its potential for creative expression. These designs showcase how different colors, textures, and landscaping can dramatically alter the pathway’s visual impact.
- Design 1: The Classic Elegance Pathway: This design utilizes a smooth, light grey concrete with a subtle, stamped texture mimicking flagstone. The edges are gently curved, creating a natural, flowing look. Mature hostas and ferns are planted along the sides, providing a lush green backdrop. The pathway’s simplicity allows the landscaping to take center stage. The grey concrete complements the greenery, creating a serene and inviting atmosphere.
- Design 2: The Mediterranean Mosaic Pathway: This design employs a darker, terracotta-colored concrete, imprinted with a geometric pattern to mimic mosaic tiles. Smaller, drought-tolerant plants such as lavender and rosemary are interspersed between the paving stones, adding pops of color and fragrance. The warm tones of the concrete and the Mediterranean-inspired plants create a sunny, vibrant feel, ideal for a warm climate.
- Design 3: The Modern Minimalist Pathway: This design uses a clean, polished concrete finish in a neutral, off-white color. The lines are straight and precise, creating a modern, minimalist aesthetic. Tall grasses and strategically placed boulders are used as landscaping elements, adding texture and visual interest without overwhelming the clean lines of the pathway. The stark contrast between the smooth concrete and the rough textures of the landscaping creates a visually striking pathway.
Lighting Effects on Pathway Appearance
Appropriate lighting dramatically enhances a pathway’s nighttime appeal and safety. Different lighting options create a unique ambiance.
- Path Lights: These low-voltage lights, embedded along the pathway’s edges, provide soft, ambient illumination, highlighting the pathway’s texture and the surrounding landscaping. They create a welcoming and safe atmosphere without being overly bright.
- Spotlights: Strategically placed spotlights can highlight specific features, such as a particularly attractive plant or a decorative element along the pathway. They can create a more dramatic and focused lighting effect than path lights.
- Uplighting: Uplighting planted areas bordering the pathway can create a magical ambiance, casting interesting shadows and highlighting the foliage. This technique works especially well with taller plants or trees near the pathway.
Landscaping and Pathway Integration
Careful landscaping choices can significantly elevate a pathway’s aesthetic appeal. The integration of plants, ground cover, and other elements is key.
For instance, the use of low-growing groundcover plants can soften the pathway’s edges, creating a seamless transition between the paved area and the surrounding lawn. Taller plants can be strategically placed to frame the pathway, adding vertical interest and visual depth. Adding decorative elements like boulders or sculptures can also enhance the overall design, providing focal points and adding texture.
Aesthetic Comparison of Pathway Materials
Concrete offers versatility in terms of color, texture, and design options, making it a popular choice. However, other materials like brick, stone, and pavers each have unique aesthetic qualities.
Brick pathways offer a classic, rustic charm, while stone pathways exude a sense of natural elegance. Pavers provide a wide range of styles and colors, allowing for greater design flexibility. The choice depends on the desired aesthetic and the overall style of the landscape. Concrete’s affordability and ease of installation often make it a practical choice, but the other options can provide unique visual interest depending on the desired effect.
Closing Notes

Source: com.au
Creating your backyard concrete pathway is a rewarding project that significantly improves your outdoor space. From the initial planning stages to the final touches, remember to prioritize proper drainage, choose materials that fit your style and budget, and follow the construction steps carefully for a long-lasting result. With a little effort and this guide, you’ll have a stunning pathway that you’ll enjoy for years to come. So grab your tools and let’s get started!