Concrete Pathway Around House A DIY Guide
A concrete pathway around the house—it sounds simple, right? But creating a beautiful, functional, and long-lasting pathway involves more than just pouring concrete. From careful planning and design to choosing the right materials and mastering the construction process, building a concrete pathway is a project that requires attention to detail at every stage. This guide will walk you through each step, helping you create a pathway that enhances your home’s curb appeal and provides years of enjoyment.
We’ll cover everything from initial design considerations—like pathway width, material selection, and cost estimation for various house styles—to obtaining necessary permits and understanding local regulations. We’ll delve into the specifics of concrete mixes, material costs, and construction techniques, ensuring you know how to build a sturdy and aesthetically pleasing pathway. Finally, we’ll discuss maintenance, repair, and even environmentally conscious choices for a truly comprehensive guide.
Planning & Design

Source: imgur.com
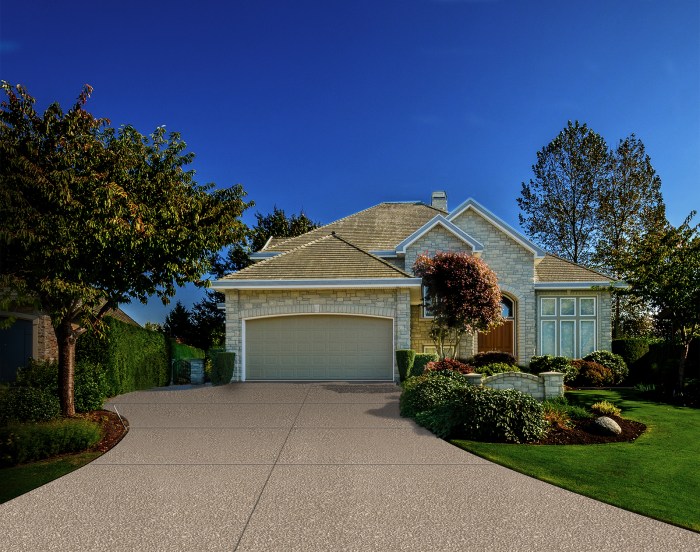
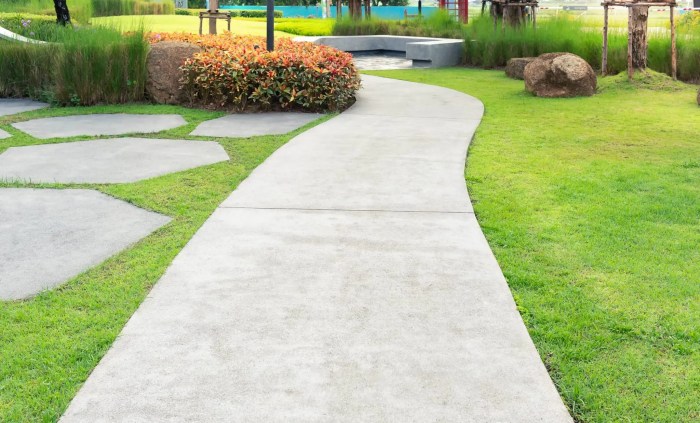
Designing a concrete pathway involves more than just pouring cement; it’s about integrating functionality and aesthetics with your home’s style. Careful planning ensures a pathway that’s both beautiful and practical, enhancing your property’s value and curb appeal. This section Articulates key considerations for planning and designing your pathway.
Pathway Design for Different House Styles
The style of your pathway should complement your home’s architecture. A winding, meandering path might suit a Victorian home, while a clean, straight path might be more appropriate for a modern home. Consider these examples:
| House Style | Pathway Width (ft) | Material | Estimated Cost (USD) |
|---|---|---|---|
| Victorian | 3-4 | Stamped concrete with decorative borders | $1500 – $3000 (per 100 sq ft) |
| Ranch | 3-4 | Smooth, plain concrete | $1000 – $2000 (per 100 sq ft) |
| Modern | 2-3 | Exposed aggregate concrete | $1200 – $2500 (per 100 sq ft) |
Note: These cost estimates are approximate and can vary significantly based on location, labor costs, and material choices.
Obtaining Necessary Permits
Before starting any construction, it’s crucial to obtain the necessary permits from your local authorities. This typically involves submitting plans detailing the pathway’s dimensions, location, and materials. Contact your local building department to understand their specific requirements and application process. Failing to obtain permits can result in fines or even the need to demolish the pathway. Expect a review period of several days to a few weeks, depending on your locality’s workload.
Pathway Location Considerations
Choosing the right location for your pathway is essential for both functionality and aesthetics. Consider these factors:
Accessibility: The pathway should provide easy and safe access to all main entrances and frequently used areas of your property. Avoid sharp turns or steep inclines, particularly if you have mobility challenges or expect guests with mobility limitations.
Drainage: Proper drainage is critical to prevent water accumulation and erosion. The pathway should be sloped slightly away from your house to direct water flow. Consider incorporating drainage solutions like gravel beds or French drains if necessary.
Aesthetics: The pathway should enhance the overall look of your property. Consider its visual impact from different angles, ensuring it complements your landscaping and house style. The pathway should be visually appealing and integrated seamlessly with your home’s architectural style.
Materials & Costs
Source: cbc.ca
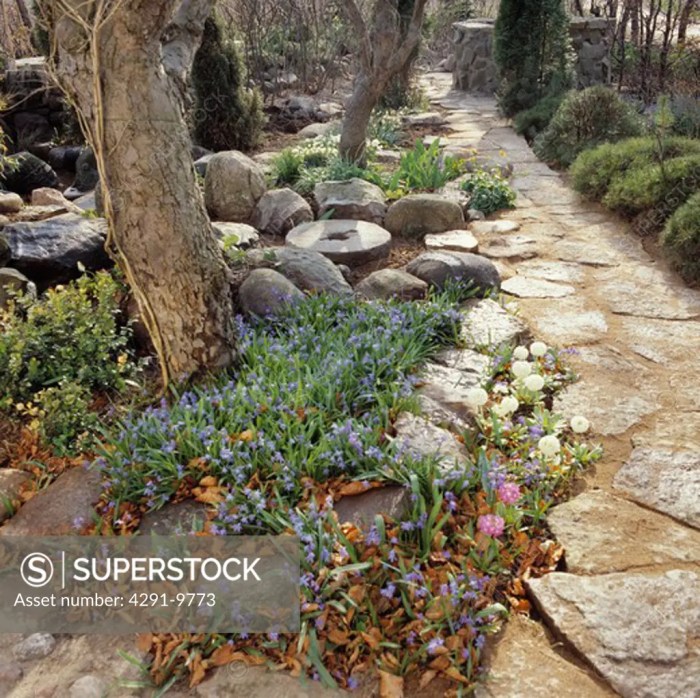
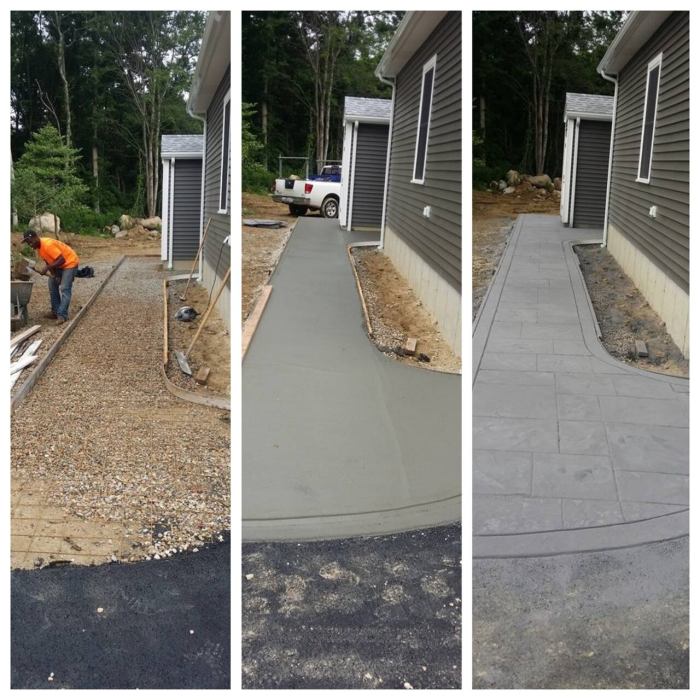
Planning your concrete pathway involves careful consideration of materials and associated costs. Choosing the right concrete mix and accurately estimating expenses are crucial for a successful project. This section will guide you through selecting appropriate materials and calculating the overall cost of your 100 sq ft pathway.
Concrete Mix Selection
Different concrete mixes offer varying strengths, workability, and costs. The optimal choice depends on factors like anticipated traffic and aesthetic preferences.
| Concrete Mix Type | Strengths | Weaknesses |
|---|---|---|
| Standard Mix (4000 psi) | Cost-effective, and suitable for residential pathways with moderate foot traffic. | May crack under heavy loads or extreme temperature fluctuations. Less durable than higher-strength mixes. |
| High-Strength Mix (5000 psi+) | Increased durability and resistance to cracking, suitable for high-traffic areas. | More expensive than standard mixes. |
| Fiber-Reinforced Concrete | Improved crack resistance, increased durability, and reduced shrinkage cracking. | Higher initial cost compared to standard mixes. |
Material Cost Breakdown (100 sq ft Pathway)
This breakdown assumes a 4-inch thick pathway. Adjust quantities based on your desired thickness. Prices are estimates and can vary significantly based on location and supplier.
Assuming a 4-inch thick pathway, you’ll need approximately 3.7 cubic yards of concrete (100 sq ft * 4 inches / 12 inches/foot * 1 cubic yard/27 cubic feet ≈ 3.7 cubic yards).
| Material | Quantity | Estimated Cost per Unit | Total Estimated Cost |
|---|---|---|---|
| Concrete (3.7 cubic yards) | 3.7 cubic yards | $150 – $200 per cubic yard | $555 – $740 |
| Gravel Base (for 100 sq ft, approximately 4 inches deep) | Approximately 1 cubic yard | $30 – $50 per cubic yard | $30 – $50 |
| Rebar (amount depends on pathway size and design) | Estimate based on your design; consult a professional for accurate calculations. | Varies by length and thickness | $50 – $150 (estimate) |
| Tools (Rentals or Purchase) | Shovel, wheelbarrow, screed, floats, bull float, edgers | Rental: $50 – $100; Purchase: $200 – $500 | $50 – $500 (depending on rental vs. purchase) |
Cost Estimation Methods
Accurate cost estimation is crucial for budget planning. Several methods can be used.
One common method involves obtaining multiple quotes from contractors. This allows for comparison and helps identify potential cost variations. Another method involves breaking down the project into smaller tasks (materials, labor, permits, etc.), estimating the cost of each task individually, and summing the costs to obtain the total project cost. It’s also wise to add a contingency of 10-20% to account for unforeseen expenses such as material price increases or unexpected site conditions. For a 100 sq ft pathway, a reasonable total cost estimate might range from $800 to $1500, depending on the chosen materials, labor costs, and regional pricing.
Construction Process

Source: imgur.com
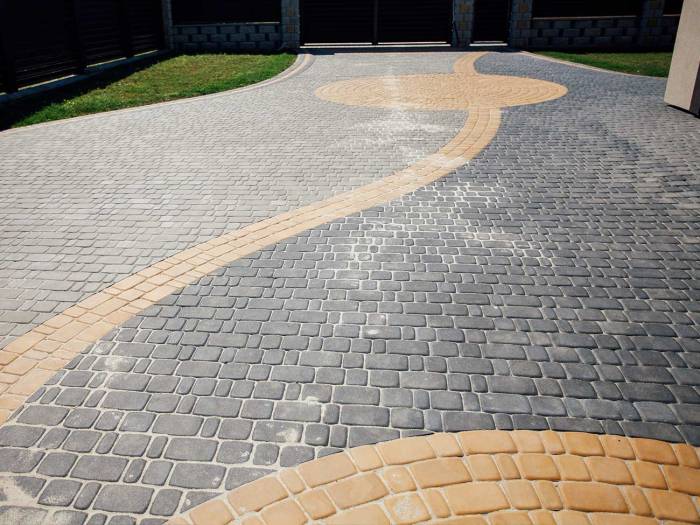
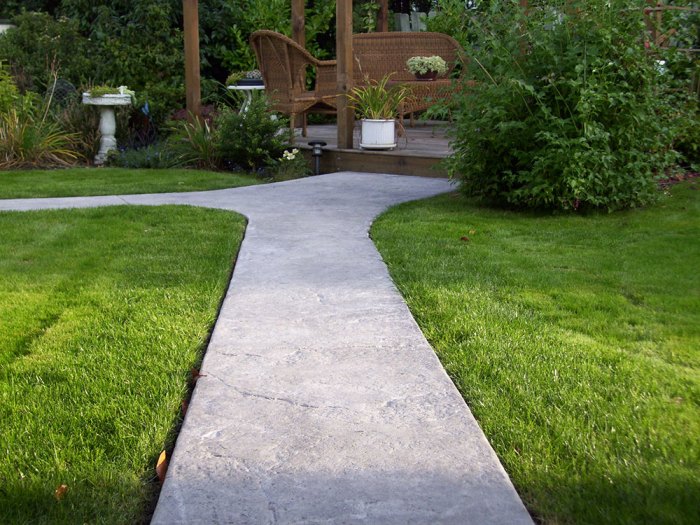
Building your concrete pathway is a rewarding project that can significantly enhance your home’s curb appeal. This section illustrates the step-by-step process, ensuring a durable and attractive pathway. Remember safety first – always wear appropriate personal protective equipment (PPE) like safety glasses and gloves.
The construction process involves several key stages, from preparing the ground to finishing and curing the concrete. Each stage is crucial for the pathway’s longevity and aesthetic appeal. Careful attention to detail at each step will result in a beautiful and functional addition to your property.
Excavation and Base Preparation
Proper excavation and base preparation are fundamental for a stable and long-lasting pathway. A poorly prepared base will lead to cracking and settling over time. The steps below Artikel the necessary preparations.
- Excavate: Dig a trench to the desired pathway depth, typically 4-6 inches deep, adding extra depth for the base. The width should match your planned pathway width plus a few inches on each side for formwork.
- Compact the Subgrade: Use a hand tamper or a plate compactor to thoroughly compact the soil at the bottom of the trench. This eliminates settling and ensures a stable foundation.
- Add a Gravel Base: Lay a 2-4 inch layer of compacted gravel (crushed stone) in the trench. This provides excellent drainage and further strengthens the base. Compact this layer thoroughly as well.
- Install Formwork: Use wooden planks or metal forms to create straight edges and define the pathway’s width and depth. Ensure the forms are level and securely staked into place.
Creating a Proper Slope for Drainage
Proper drainage is essential to prevent water accumulation and potential damage to the pathway. A slight slope directs water away from your house, preventing erosion and ice formation in colder climates.
Imagine a gentle incline, like a very shallow ramp. For a 10-foot pathway, a 1/4-inch drop over the length would be sufficient. This can be achieved by gradually raising one edge of the formwork. You can use a level and shims (small pieces of wood) to ensure the correct slope is maintained throughout the entire length. Visualize a straight line connecting the highest and lowest points of the pathway; this line represents the slope. A visual representation would show a cross-section of the pathway, illustrating the gradual downward slope away from the house.
Pouring and Finishing the Concrete
The pouring and finishing process determines the pathway’s final appearance and durability. Consistent techniques are key to achieving a smooth and even surface.
- Pour the Concrete: Pour the concrete into the forms, ensuring it reaches the desired depth. Use a shovel or wheelbarrow to evenly distribute the concrete.
- Consolidate the Concrete: Use a vibrating screed or a hand tamper to remove air pockets and consolidate the concrete. This process helps to prevent surface imperfections and ensures a strong, dense pathway.
- Level and Smooth the Surface: Use a bull float or a long-handled magnesium float to level and smooth the concrete surface. Work in overlapping strokes, ensuring a consistent texture.
- Create Texture (Optional): For a non-slip surface, you can use a broom to create a textured finish. Sweep the broom across the concrete in a consistent pattern before the concrete sets too much.
- Edge Finishing: Use an edging tool to create clean, crisp edges along the sides of the pathway. This enhances the pathway’s overall appearance.
Curing the Concrete
Curing is the process of allowing the concrete to properly hydrate and gain strength. This is critical for a durable and long-lasting pathway.
- Keep it Moist: Keep the concrete moist for at least 7 days after pouring. This can be done by covering the concrete with plastic sheeting or regularly spraying it with water. This prevents premature drying and cracking.
- Protect from Extreme Temperatures: Protect the concrete from direct sunlight and extreme temperature fluctuations during the curing process. Extreme heat can cause rapid drying and cracking while freezing temperatures can damage the concrete.
- Remove Forms: After a few days (depending on the concrete mix and weather conditions), carefully remove the formwork. Avoid damaging the edges of the newly cured concrete.
Maintenance & Repair

Source: cuttingedgeconcretemi.com
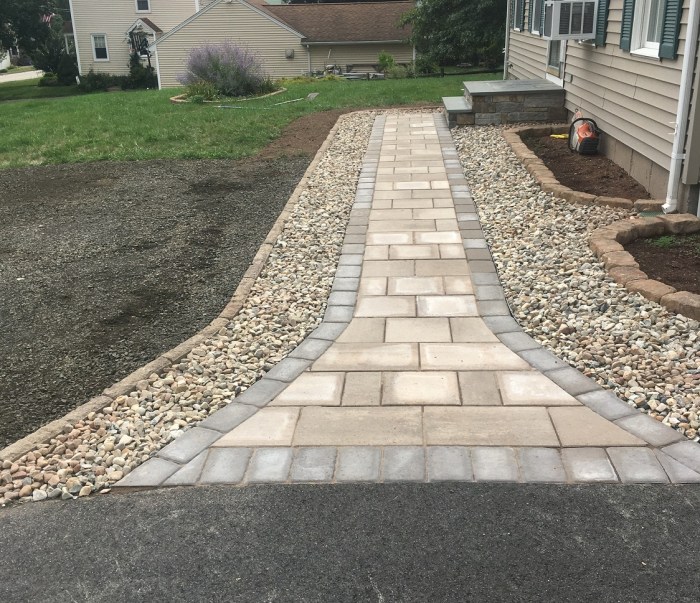
A concrete pathway, while durable, requires regular maintenance to extend its lifespan and maintain its aesthetic appeal. Ignoring minor issues can lead to more extensive and costly repairs down the line. This section identifies common problems, repair methods, and a preventative maintenance schedule.
Common Problems in Concrete Pathways
Concrete pathways are susceptible to several issues over time due to environmental factors and normal wear and tear. Cracking, settling, and staining are among the most frequent problems encountered. Cracks can range from hairline fissures to significant breaks, often caused by shifting ground, temperature fluctuations, or improper installation. Settling, a gradual sinking of the concrete can lead to uneven surfaces and tripping hazards. Stains from oil, grease, or other substances can also detract from the pathway’s appearance. These problems, if left unaddressed, can compromise the structural integrity and visual appeal of the pathway.
Repairing Damaged Concrete
Repairing minor damage is often achievable with DIY methods, while more extensive repairs might require professional intervention. The approach depends on the severity of the damage.
| Severity of Damage | Repair Method | Description |
|---|---|---|
| Hairline Cracks | Crack Sealing | Small cracks can be filled with a high-quality, flexible crack sealant. Clean the crack thoroughly, apply the sealant according to manufacturer instructions, and smooth it out. |
| Small Chips or Spalls | Patching with Concrete Repair Mortar | Remove loose debris, clean the area, and apply a patching compound specifically designed for concrete repair. Ensure proper curing time for optimal adhesion. |
| Larger Cracks or Significant Damage | Professional Repair | Extensive cracking or significant damage often necessitates professional intervention. A contractor can assess the damage and recommend appropriate solutions, which may involve partial or complete replacement of the affected section. |
| Settling | Underpinning or Re-levelling | Settling requires more involved repair. This might involve underpinning the affected section to stabilize the foundation or removing and re-laying the concrete after addressing the underlying cause of the settling. |
Concrete Pathway Maintenance Schedule
A proactive maintenance schedule can prevent many problems and extend the life of your concrete pathway.
Regular cleaning, sealing, and preventative measures are crucial.
| Task | Frequency | Description |
|---|---|---|
| Cleaning | As needed, but at least twice a year | Sweep or blow away debris regularly. For stubborn stains, use a pressure washer (low pressure) or a solution of mild detergent and water. Rinse thoroughly. |
| Sealing | Every 2-3 years | Applying a concrete sealer protects the surface from water damage, staining, and weathering. Choose a high-quality sealer suitable for exterior use. Follow the manufacturer’s instructions carefully. |
| Crack Repair | As needed | Address cracks promptly to prevent them from worsening. Small cracks can be sealed using a crack filler, while larger cracks may require professional attention. |
| Weed Control | Regularly | Prevent weeds from growing in cracks, as their roots can further damage the concrete. Use a weed killer appropriate for concrete surfaces or manually remove weeds. |
| Inspection | Twice a year | Regularly inspect the pathway for any signs of damage, such as cracks, settling, or staining. Early detection allows for timely repairs and prevents larger problems. |
Aesthetic Considerations
Source: definedconcrete.com
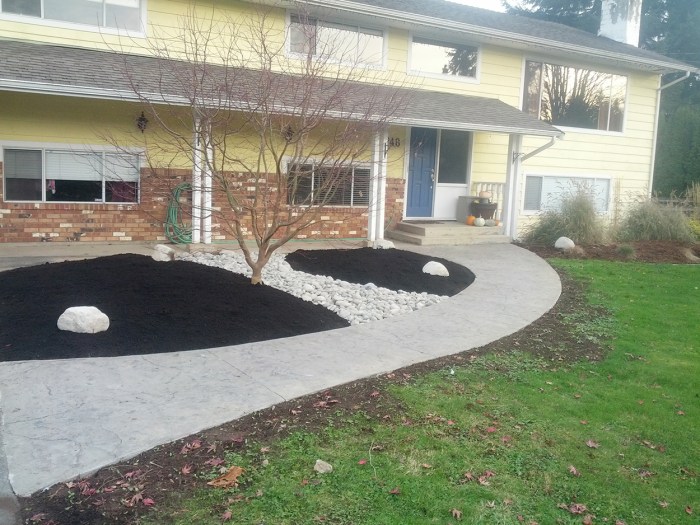
Creating a visually appealing concrete pathway is as important as its structural integrity. A well-designed pathway not only enhances the functionality of your outdoor space but also significantly boosts your home’s curb appeal. Careful consideration of color, texture, and integration with the surrounding landscape can transform a simple walkway into a stunning feature.
Let’s explore some ways to elevate the aesthetic aspects of your concrete pathway.
Decorative Concrete Options, Concrete pathway around the house
Adding decorative elements to your concrete pathway can personalize its look and increase its visual interest. Several techniques can achieve this, transforming a plain concrete surface into a unique design feature.
The following list Artikels some popular decorative options for concrete pathways:
- Stamped Concrete: This technique involves stamping a pattern onto fresh concrete, creating the look of natural stone, brick, or even wood. The patterns can range from simple geometric designs to intricate floral motifs. Proper sealing is essential to maintain the pattern’s vibrancy and protect it from the elements. For example, a stamped concrete pathway mimicking the appearance of flagstone can add a rustic charm to a cottage-style home.
- Exposed Aggregate: This method involves washing away the cement paste from the surface of the concrete, revealing the decorative aggregates (like stones, pebbles, or colored gravel) embedded within it. This creates a textured and visually appealing surface with a natural, rustic look. A pathway with exposed river rock aggregates would complement a landscaping scheme featuring natural rock formations.
- Embedded Stones or Tiles: Incorporating natural stones, glass tiles, or even recycled materials directly into the concrete during pouring creates a unique and artistic effect. This allows for a high degree of customization and can reflect personal style or complement existing landscape features. Imagine a pathway with embedded sea glass pieces, creating a shimmering effect in sunlight, perfect for a coastal home.
- Concrete Staining: Applying acid stains to the concrete surface can create a variety of colors and patterns. Acid stains penetrate the concrete, producing a rich, natural look that’s less likely to chip or fade than surface-applied paints. For instance, a warm terracotta stain could beautifully complement a Mediterranean-style garden.
Color and Finish Selection
The color and finish of your concrete pathway significantly influence its overall aesthetic. Careful selection can enhance the pathway’s integration with the surrounding environment and create a specific mood or atmosphere.
Different finishes offer unique visual and textural qualities:
- Smooth Finish: Offers a clean, modern look, but can be slippery when wet.
- Broomed Finish: This creates a textured surface with a slightly rough appearance, providing better traction and a more rustic feel.
- Exposed Aggregate Finish: As previously mentioned, this offers a unique textural appeal and a natural look.
Color choices should complement the house’s exterior and the surrounding landscape. Neutral colors, such as gray, beige, or brown, often provide a timeless and versatile look. However, bolder colors can be used to create a striking focal point or to highlight specific design elements.
Pathway Integration with Landscaping
The pathway shouldn’t exist in isolation; it should be seamlessly integrated with the overall landscaping design. Consider the following points:
Successful integration requires careful planning and consideration of the surrounding elements:
- Curvilinear Paths: These create a more natural and inviting feel, especially in gardens with curves and flowing lines. They can guide the eye through the landscape and create a sense of discovery.
- Straight Paths: These offer a more formal and structured look, often suitable for modern or minimalist designs. They provide a clear and direct route.
- Plantings: Strategically placed plants and shrubs can soften the edges of the pathway and create a visually appealing transition between the pathway and the surrounding landscape. Consider using low-growing plants to avoid obstructing the path.
- Lighting: Path lighting not only enhances safety but also adds a touch of elegance and ambiance. Consider using low-voltage landscape lighting to highlight the pathway and its decorative elements.
Environmental Impact: Concrete Pathway Around House
Source: definedconcrete.com
Creating a concrete pathway around your house, while offering durability and a clean look, does have environmental consequences we should consider. The production and use of concrete contribute to greenhouse gas emissions and can impact local water systems. Understanding these impacts and exploring ways to mitigate them is crucial for responsible home improvement.
Concrete’s environmental footprint is primarily linked to its high embodied carbon – the carbon dioxide released during the manufacturing process. Cement, a key ingredient in concrete, requires high temperatures for production, releasing significant CO2 into the atmosphere. Additionally, the transportation of raw materials and the finished concrete adds to the overall carbon footprint. Another concern is stormwater runoff. Impermeable concrete surfaces prevent water from naturally percolating into the ground, potentially leading to increased surface runoff, soil erosion, and contamination of waterways with pollutants picked up from the pathway.
Concrete Production and Carbon Emissions
The cement industry is a major contributor to global CO2 emissions. The chemical reactions involved in cement production release large amounts of carbon dioxide. For example, the production of one ton of cement can release approximately 0.8 tons of CO2. The scale of a residential pathway project is relatively small compared to large-scale construction, but the cumulative effect of many such projects contributes to the overall environmental impact. The energy used in transporting raw materials like aggregates and cement to the construction site also adds to the carbon footprint. Choosing locally sourced materials can significantly reduce this aspect of the environmental impact.
Minimizing the Environmental Impact of Concrete Pathways
Several strategies can lessen the environmental impact of concrete pathway construction. Using low-carbon concrete, which incorporates supplementary cementitious materials like fly ash or slag, reduces CO2 emissions during production. These materials replace a portion of the cement, lowering the overall carbon footprint. Another approach is to optimize the design to minimize the amount of concrete needed. Careful planning can reduce the overall surface area of the pathway, thereby reducing the amount of concrete required. Proper construction techniques also play a role. Avoiding waste and efficiently using materials reduces the environmental burden. Finally, incorporating permeable paving techniques can help manage stormwater runoff effectively.
Comparison of Pathway Materials
The following table compares the environmental impact of concrete pathways with alternatives such as pavers and gravel. Note that these are general comparisons and the specific environmental impact can vary based on factors like material sourcing, manufacturing processes, and transportation distances.
| Material | Carbon Footprint | Runoff | Other Environmental Impacts |
|---|---|---|---|
| Concrete | High (due to cement production) | Low permeability, increased runoff | Potential for habitat disruption during installation |
| Pavers (e.g., brick, stone) | Moderate (varies greatly depending on material and source) | Moderate permeability (depending on installation method and joint type) | Material sourcing can have a significant environmental impact (e.g., quarrying stone) |
| Gravel | Low (generally less processed than other materials) | High permeability, reduced runoff | Potential for erosion and dust generation |
Final Summary
Source: dnaconcretekansascity.com
Building a concrete pathway around your house is a rewarding project that significantly improves your home’s exterior. By following the steps Artikel in this guide, you can create a pathway that’s both functional and visually appealing. Remember to plan carefully, choose quality materials, and execute the construction process meticulously. With a little effort and attention to detail, you’ll enjoy a beautiful, durable pathway for years to come. Don’t forget to consider the aesthetic aspects and environmental impact to create a pathway that truly complements your home and landscape.