Decorative Concrete Walkway A Complete Guide
Decorative concrete walkways transform ordinary pathways into stunning features. This guide dives into everything you need to know, from choosing the right type of concrete and designing your dream walkway to the installation process, maintenance, and cost considerations. Whether you’re a DIY enthusiast or hiring a professional, we’ll equip you with the knowledge to create a beautiful and durable walkway that enhances your home’s curb appeal.
We’ll cover various decorative concrete options—stamped, stained, exposed aggregate—comparing their aesthetics, durability, and costs. We’ll walk you through the planning stages, including design, site preparation, and material selection, offering practical tips and visual aids along the way. Finally, we’ll explore maintenance strategies to ensure your walkway remains a showstopper for years to come.
Types of Decorative Concrete Walkways

Source: dreamstime.com
Choosing the right type of decorative concrete for your walkway significantly impacts its aesthetic appeal, durability, and long-term maintenance. Several options exist, each with unique characteristics and suitability for different projects and architectural styles. Let’s explore some popular choices.
Decorative Concrete Walkway Types: A Comparison
The following table summarizes the key features of different decorative concrete walkway types. Remember that costs can vary greatly based on location, labor rates, and the complexity of the design.
| Type | Cost (Relative) | Durability | Maintenance |
|---|---|---|---|
| Stamped Concrete | Medium to High | High (with proper sealing) | Moderate (sealing every few years) |
| Stained Concrete | Low to Medium | High | Low (occasional cleaning) |
| Exposed Aggregate Concrete | Medium | Very High | Low (occasional cleaning) |
| Acid-Stained Concrete | Low to Medium | High | Low (occasional cleaning) |
| Textured Concrete | Low to Medium | High | Low (occasional cleaning) |
Aesthetic Appeal and Architectural Styles
Each decorative concrete type lends itself to different aesthetic styles.
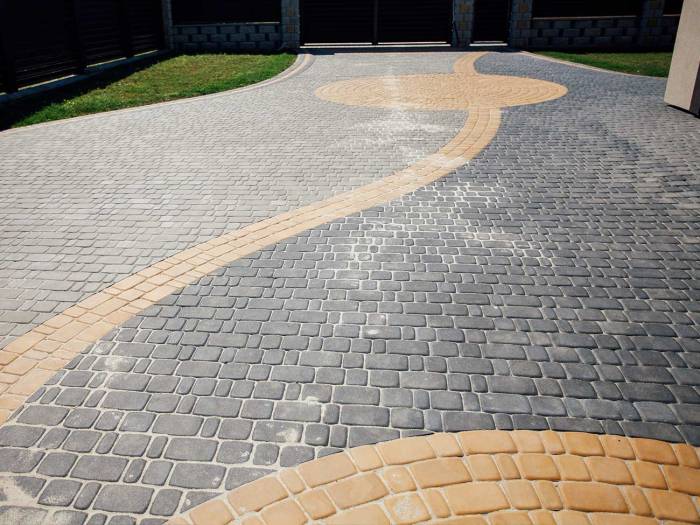
Stamped Concrete: Offers incredible versatility. It can mimic the look of natural stone (flagstone, slate, brick), cobblestones, or even wood planks. This makes it suitable for a wide range of architectural styles, from traditional to contemporary. Imagine a walkway mimicking the look of rustic cobblestones in a cottage-style garden, or sleek, modern flagstones complementing a minimalist home.
Stained Concrete: Provides a rich, earthy look. The stains penetrate the concrete, creating a durable, long-lasting color. Acid stains, in particular, produce unique and variegated patterns. This works well with Mediterranean, Southwestern, or even modern designs that emphasize natural color palettes. A rich terracotta stain would complement a Spanish-style home beautifully, while subtle earth tones might enhance a contemporary landscape.
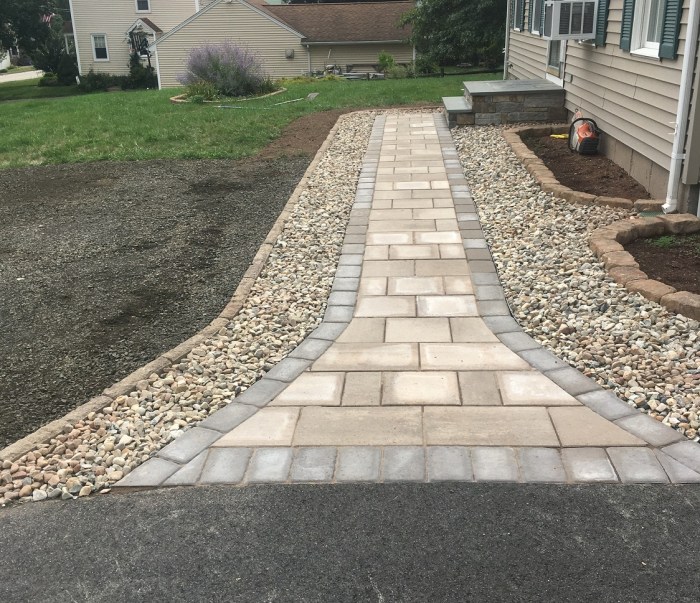
Exposed Aggregate Concrete: Creates a rugged, textured surface by exposing the decorative aggregates (like pebbles or stones) embedded in the concrete mix. Its natural, durable quality makes it ideal for rustic, traditional, or even modern designs with a focus on natural materials. Picture a walkway with exposed river stones perfectly complementing a modern farmhouse or a rustic cabin.
Acid-Stained and Textured Concrete: Acid-stained concrete offers a range of colors and patterns achieved through chemical reactions with the concrete. Textured concrete involves applying various techniques to create patterns and reliefs on the surface. Both options can adapt to various styles depending on the chosen texture and color palette. For instance, a lightly textured surface with a subtle acid stain can seamlessly blend with a contemporary setting.
Unique Design Patterns
The possibilities for unique design patterns are virtually limitless.
Stamped Concrete: Beyond basic patterns, you can incorporate custom designs, borders, and even logos. Imagine a walkway with a repeating leaf pattern or a family crest subtly integrated into the design. Consider using different stamp sizes and orientations to create visual interest.
Stained Concrete: Acid stains can create unpredictable and stunning patterns, making each walkway unique. The interplay of colors and the natural veining produced by the chemical reaction can add depth and character. A blend of warm browns and deep reds could create a dramatic walkway with a natural, almost artistic feel.
Exposed Aggregate Concrete: The choice of aggregate itself dictates the design. Using a mix of different colored stones or pebbles can create intricate patterns. Varying the size and distribution of the aggregates adds further visual interest. A combination of white and grey pebbles could create a stunning, modern walkway.
Acid-Stained and Textured Concrete: Combining these two techniques opens up even more possibilities. For instance, a textured surface could be acid-stained to create a multi-toned effect, adding depth and dimension. A swirl pattern achieved through texturing and then stained with a combination of colors would be a truly unique feature.
Design and Planning

Source: dreamstime.com
Planning your decorative concrete walkway is crucial for a beautiful and long-lasting result. Careful consideration of design, materials, and site preparation will ensure a smooth installation process and a walkway that enhances your property’s aesthetic appeal. This section will guide you through the essential steps.
Successful walkway design involves a blend of artistic vision and practical considerations. You’ll need to account for the walkway’s function, your budget, and local building codes. The process begins with site preparation and continues through design visualization and material selection.
Site Preparation and Measurements
Before even thinking about designs, you need to prepare the ground. This involves clearing the area of any vegetation, debris, and existing pavement. Accurate measurements are essential for ordering the correct amount of concrete and materials. Use measuring tape to determine the walkway’s length, width, and any changes in direction. Sketch a basic Artikel of the walkway’s path on the ground, noting any obstacles or features like existing landscaping or utilities. Consider using stakes and string to mark the walkway’s boundaries for clear visualization. It’s also important to check for underground utilities to prevent accidental damage during excavation. For example, calling your local utility company before digging is a standard practice to ensure you won’t accidentally cut a gas line or other service.
Creating a Design for a Decorative Concrete Walkway
Now for the fun part: designing your walkway! Visualizing your design is key to a successful project. Consider using sketching, digital design software, or even physical mockups to experiment with different patterns and colors.
Image 1: Sketching the Walkway Design – This image shows a hand-drawn sketch of a walkway design. The sketch includes the dimensions of the walkway, a simple pattern (perhaps a repeating geometric shape or a flowing organic design), and indications of the chosen color palette (perhaps using colored pencils or markers). The sketch is not overly detailed but communicates the basic design intent.
Image 2: Exploring Color and Texture Options – This image shows various samples of decorative concrete finishes. Different colors are presented, ranging from classic greys and browns to more vibrant hues. The image also highlights various textures, showing examples of stamped concrete with different patterns (like brick or stone), exposed aggregate, and smooth finishes. This helps the designer visualize the final look and feel.
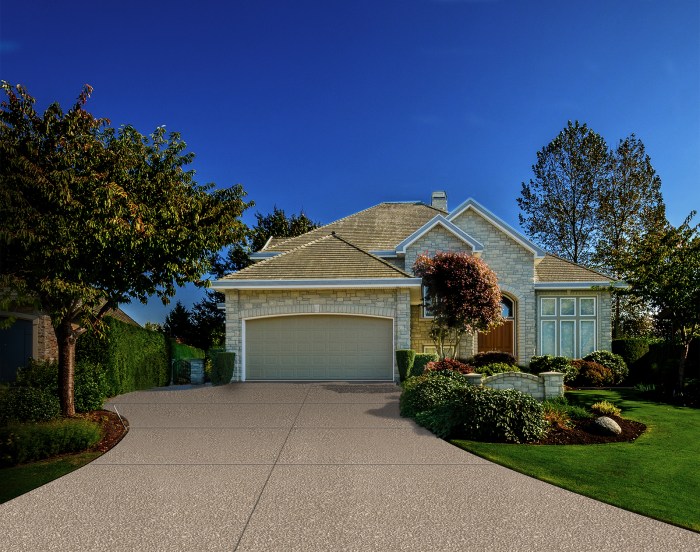
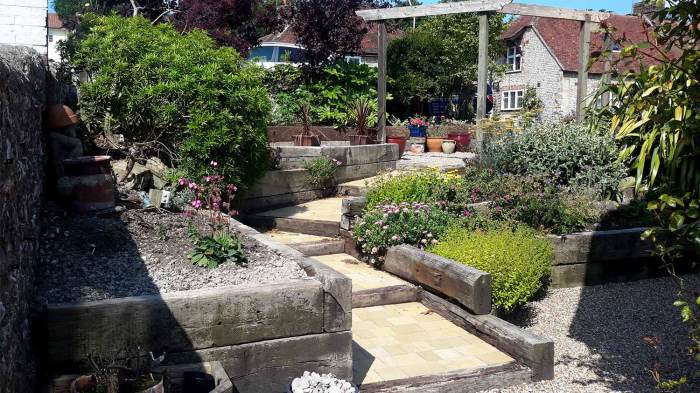
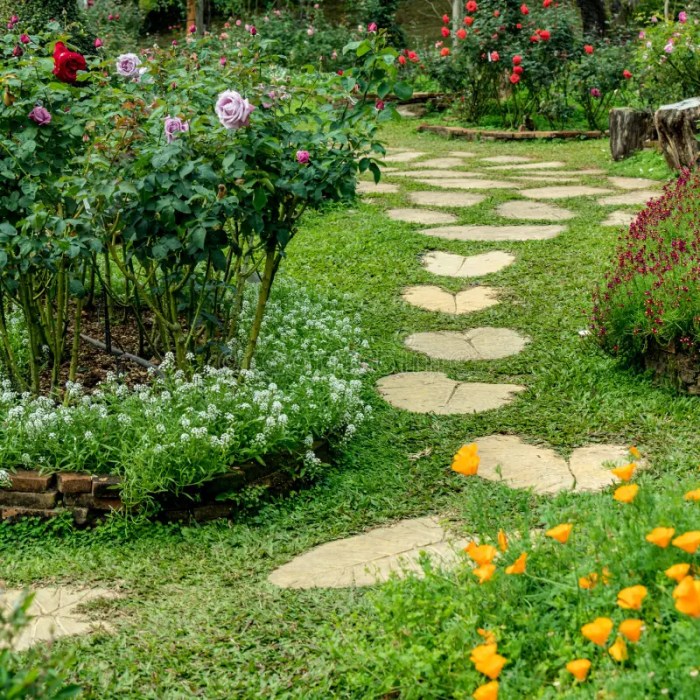
Image 3: Incorporating Existing Landscape Features – This image depicts a walkway design that seamlessly integrates with existing landscaping. The walkway’s path gracefully curves around a mature tree, and the color palette complements the surrounding plants and flowers. This image emphasizes the importance of considering the surrounding environment in the design process.
Material Selection
Choosing the right materials is essential for durability and aesthetics. Consider the type of concrete (e.g., high-strength, colored), the aggregate (e.g., gravel, stone), any additives for color or texture, and any sealing products for protection. Obtain samples of concrete colors and textures to see how they look in natural light and under different weather conditions. For example, a darker color might absorb more heat, which could be a consideration in hotter climates. Compare prices from different suppliers to find the best value for your needs.
Accessibility and Building Codes
Designing for accessibility is crucial. Ensure the walkway meets ADA (Americans with Disabilities Act) guidelines regarding slope, width, and surface texture to ensure it’s safe and usable for everyone. Check with your local building department for specific codes and regulations regarding walkway construction, including permits, materials, and installation requirements. For instance, some municipalities have strict rules about the slope of walkways to prevent water runoff issues. These regulations often vary depending on local climate and soil conditions.
Installation Process
Source: dreamstime.com
Laying a stamped concrete walkway is a rewarding DIY project, but proper technique is crucial for a long-lasting, attractive result. This section details the steps involved, from mixing the concrete to sealing the finished product. Remember to always consult the manufacturer’s instructions for your specific materials.
Successful stamped concrete installation hinges on careful planning and execution. A smooth, even base is paramount for a professional finish, minimizing the appearance of imperfections and ensuring even wear over time.
Stamped Concrete Walkway Installation Steps
This step-by-step guide Artikels the key stages of installing a stamped concrete walkway. Each step plays a vital role in achieving the desired aesthetic and durability.
- Preparation: Begin by excavating the walkway area to the desired depth (typically 4-6 inches), ensuring a level and compacted base. Add a layer of gravel for drainage and further compaction. Install edging to contain the concrete.
- Concrete Mixing: Mix the concrete according to the manufacturer’s instructions, typically using a concrete mixer for larger projects. Aim for a consistent, workable mix that isn’t too wet or too dry. Too much water weakens the concrete, while too little makes it difficult to work with.
- Pouring and Leveling: Pour the concrete into the prepared area, ensuring even distribution. Use a screed (a long, straight board) to level the surface, working it back and forth to create a smooth, consistent layer. A bull float can further smooth the surface, removing air pockets and excess water.
- Stamping: Once the concrete reaches the appropriate workable consistency (usually within 15-30 minutes after pouring, depending on weather and mix), begin stamping. Use stamping mats, pressing firmly and evenly to create the desired pattern. Avoid overworking the concrete, as this can cause imperfections. Different stamping patterns and techniques exist, and you should carefully read your chosen pattern’s instructions.
- Texturing and Detailing: After stamping, you might use texturing tools to enhance the pattern, creating realistic-looking cracks, stones, or other details. This adds depth and realism to the finished product.
- Sealing: Once the concrete has cured sufficiently (typically 24-72 hours, depending on weather conditions), apply a sealant. This protects the concrete from weathering, staining, and damage, enhancing its lifespan and maintaining its appearance. Apply multiple coats as instructed on the sealant product.
- Curing: Proper curing is essential for the concrete’s strength and durability. Keep the concrete moist for several days after pouring, using a curing compound or regularly spraying it with water to prevent it from drying out too quickly. This process helps the concrete reach its full strength and prevent cracking.
Achieving a Smooth and Even Surface
A smooth, even surface is key to a professional-looking stamped concrete walkway. Several techniques contribute to this outcome.
- Proper Base Preparation: A well-compacted, level base is fundamental. Any unevenness will show through the finished concrete.
- Consistent Concrete Mix: Use the correct water-cement ratio to achieve a workable consistency. Too much water weakens the concrete and can lead to surface imperfections.
- Careful Screeding and Floating: Take your time to level the concrete thoroughly using a screed and bull float, ensuring a smooth, even surface before stamping.
- Even Stamping Pressure: Apply consistent pressure when stamping to avoid uneven impressions or marks.
Stamped Concrete vs. Stained Concrete Installation
While both stamped and stained concrete offer decorative options, their installation methods differ significantly.
| Feature | Stamped Concrete | Stained Concrete |
|---|---|---|
| Base Preparation | Requires a level, compacted base, often with gravel. | Similar to base preparation, but less critical for minor imperfections as stain hides them. |
| Concrete Placement | Requires pouring and leveling a relatively thick layer of concrete. | Uses a thinner layer of concrete, often poured and finished with a trowel for a smoother finish. |
| Decorative Process | Involves stamping patterns into the concrete before it sets. | Involves applying stains to the concrete surface after it has cured. |
| Sealing | Requires sealing to protect the stamped pattern and concrete. | Sealing is recommended to protect the stain and concrete. |
Maintenance and Repair
Source: shutterstock.com
Keeping your decorative concrete walkway looking its best requires a regular maintenance schedule. Neglecting maintenance can lead to premature deterioration and costly repairs down the line. This section Artikels a practical approach to ensuring your walkway remains attractive and functional for years to come.
Maintenance Schedule
A proactive maintenance plan is key to extending the life of your decorative concrete walkway. This schedule Artikels essential tasks and their recommended frequency. Remember to adjust the schedule based on your climate and the specific wear and tear on your walkway.
| Task | Frequency | Details | Notes |
|---|---|---|---|
| Cleaning | Monthly (or as needed) | Sweep or blow away loose debris. Use a pressure washer (low pressure) for stubborn stains, but avoid excessive water pressure which can damage the surface. | Use a mild detergent if necessary. |
| Sealing | Every 2-3 years | Apply a high-quality sealer to protect against staining, weathering, and deterioration. | Follow the sealer manufacturer’s instructions carefully. |
| Crack Repair | As needed | Repair any cracks promptly to prevent them from widening and causing further damage. | Use a suitable crack filler designed for concrete. |
| Weed Removal | As needed | Remove weeds promptly to prevent root damage and unsightly growth. | Use a non-chemical weed killer if necessary, ensuring it’s compatible with concrete. |
Common Problems and Solutions
Understanding common issues and their solutions can save you time, money, and frustration. This table provides a quick reference guide for troubleshooting problems with your decorative concrete walkway.
| Problem | Cause | Solution | Prevention |
|---|---|---|---|
| Cracking | Poor installation, settling, temperature changes, freeze-thaw cycles | Repair cracks with a suitable filler; for larger cracks, consult a concrete professional. | Proper base preparation, expansion joints, and using high-quality concrete. |
| Staining | Oil, grease, mildew, chemicals | Clean with a suitable cleaner; for stubborn stains, consider professional cleaning. | Prompt cleaning of spills, regular sealing, and avoiding harsh chemicals. |
| Spalling | Freeze-thaw cycles, poor concrete mix, chemical attack | Repair damaged areas with a patching compound; for extensive damage, consider professional repair. | Using high-quality concrete, proper curing, and sealing. |
| Efflorescence | Water soluble salts rising to the surface | Clean with water and a stiff brush; in severe cases, professional cleaning may be necessary. | Proper drainage to prevent water accumulation. |
Sealers and Their Benefits
Choosing the right sealer is crucial for protecting your investment. Different sealers offer varying levels of protection and aesthetics.
Several types of sealers are available, each with its own set of benefits:
| Sealer Type | Benefits | Considerations |
|---|---|---|
| Acrylic Sealers | Good UV protection, enhances color, relatively easy to apply. | May require more frequent reapplication than other types. |
| Epoxy Sealers | Excellent protection against chemicals and abrasion, very durable. | More expensive and requires professional application for the best results. |
| Siloxane Sealers | High breathability, allowing moisture vapor to escape, excellent for preventing efflorescence. | Can be more expensive than acrylic sealers. |
| Penetrating Sealers | Seals from within the concrete, enhancing durability and resistance to staining. | May not provide as much surface protection as film-forming sealers. |
Cost Considerations
Source: dreamstime.com
Planning a decorative concrete walkway involves more than just aesthetics; a realistic budget is crucial for a successful project. Understanding the various cost components and factors influencing them will help you manage your project effectively and avoid unexpected expenses. This section breaks down the typical costs, offering a framework for creating your budget.
Material Costs
Material costs form a significant portion of your overall expenditure. These include concrete itself (consider the type; colored concrete is typically more expensive), aggregates (like gravel or stones for added texture), any decorative elements (stamped patterns, exposed aggregate, etc.), sealants, and necessary tools (if you’re not hiring a contractor for all aspects). Prices vary based on location and material choices. For example, using high-quality, specialized pigments for colored concrete will increase costs compared to standard gray concrete. Similarly, intricate stamped patterns will be pricier than simpler designs. A good rule of thumb is to allocate a generous portion of your budget to materials, especially if you’re opting for premium or unique options.
Labor Costs, Decorative Concrete Walkway
Labor costs depend heavily on the project’s size and complexity. Hiring a professional concrete contractor is generally recommended, especially for intricate designs or large areas. Their rates vary geographically and according to experience and expertise. If you choose to undertake some aspects yourself (e.g., preparing the ground), you’ll save on labor but need to factor in the time commitment and potential for mistakes. For a small, simple walkway, you might find that DIY is cost-effective, but complex designs, such as those involving intricate patterns or multiple levels, are best left to professionals. Always get multiple quotes from different contractors to compare pricing and services.
Permit Costs
Permits are a necessary expense in most jurisdictions before beginning any construction work. The cost varies depending on your location and the project’s scope. Contact your local building department to inquire about necessary permits and associated fees. Failing to obtain the required permits can lead to fines and delays, making it a worthwhile investment upfront. The permit application process may also involve additional fees for inspections.
Factors Influencing Overall Cost
Several factors significantly influence the final cost. The size of the walkway is a primary determinant; larger areas naturally require more materials and labor. The complexity of the design also plays a role; intricate patterns, custom colors, and multiple levels increase both material and labor costs. The location of the project can impact costs as well. Difficult-to-access locations might necessitate specialized equipment or techniques, driving up labor expenses. Finally, the condition of the existing ground needs to be considered; significant site preparation, such as extensive excavation or grading, can add considerable cost.
Creating a Simple Budget
A simple budget for a decorative concrete walkway can be created using a spreadsheet or budgeting app. Start by estimating the walkway’s dimensions to calculate the square footage. Research material costs in your area, obtaining quotes from suppliers for concrete, aggregates, and any decorative elements. Next, obtain at least three quotes from contractors for labor, specifying the design and desired finish. Include permit fees obtained from your local building department. Add a contingency buffer (10-15% of the total estimated cost) to account for unforeseen expenses. A realistic budget will allow you to make informed decisions about design choices and ensure a smooth project execution. For example, a 100 sq ft walkway with a simple design might cost between $2,000 and $5,000, while a larger, more complex project could easily exceed $10,000. These figures are estimates and can vary greatly based on location and specifics.
Creative Design Ideas: Decorative Concrete Walkway
Source: dreamstime.com
Designing a decorative concrete walkway offers a fantastic opportunity to inject personality and style into your outdoor space. The possibilities are virtually limitless, allowing you to create a walkway that complements your home’s architecture and landscaping while enhancing its overall curb appeal. By carefully considering color palettes, patterns, textures, and the incorporation of natural elements, you can achieve a truly unique and visually stunning result.
Color, texture, and pattern choices significantly impact the walkway’s aesthetic. Strategic use of these elements can create illusions of depth, width, and even guide the eye along the path. For instance, lighter colors can make a narrow walkway appear wider, while darker shades can create a more intimate feel. Similarly, textured surfaces offer a tactile and visual richness, adding depth and character to the design.
Color and Texture Enhancements
The visual appeal of a concrete walkway is greatly enhanced by thoughtful color and texture choices. Consider these examples:
- Using a blend of warm earth tones (browns, tans, reds) for a rustic, natural look, possibly incorporating stamped textures mimicking flagstone or slate.
- Employing cool, contrasting colors (blues, grays, greens) to create a modern, sophisticated feel, perhaps with a smooth, polished finish.
- Adding metallic pigments (copper, bronze, silver) for a touch of elegance and shimmer, combined with a textured surface like exposed aggregate.
- Creating a multi-toned effect by using various color hardeners and applying them in different patterns, producing a visually interesting and dynamic walkway.
- Using a combination of contrasting colors and textures to highlight different sections of the walkway, for example, using a smooth, light-colored section to highlight a turning point.
Incorporating Natural Elements
Natural elements can seamlessly integrate with the concrete, creating a cohesive and visually appealing walkway.
Integrating natural elements into your concrete walkway design can create a more harmonious blend with the surrounding landscape. This can significantly enhance the walkway’s overall aesthetic appeal.
- Incorporating river stones or pebbles into the concrete mix for a natural, textured finish.
- Using stamped concrete to mimic the look of natural stone, such as flagstone or slate, for a more rustic appearance.
- Planting low-growing shrubs or ground cover along the sides of the walkway to soften the edges and add a touch of greenery.
- Adding decorative borders made from natural materials, such as wood or stone, to frame the walkway and create a defined space.
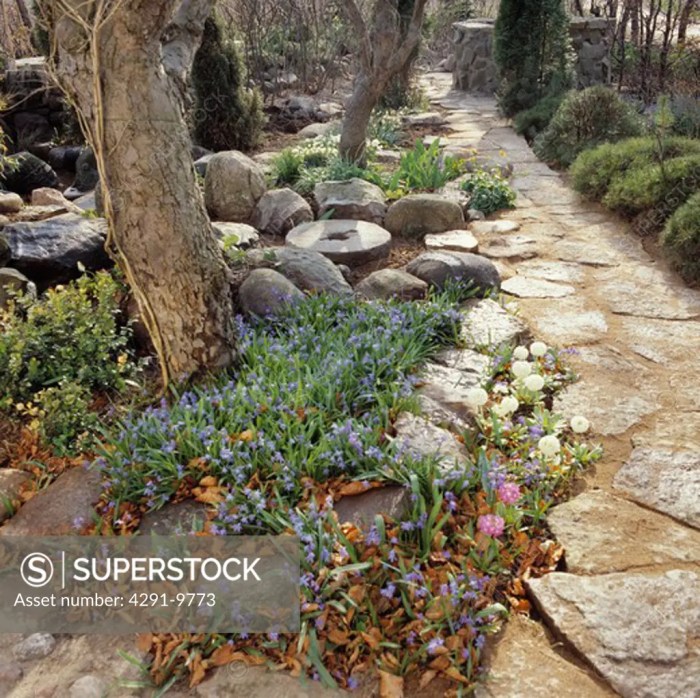
- Creating a pathway that winds through existing flowerbeds or landscaping, allows the walkway to become a natural extension of the garden.
Ten Unique Walkway Designs
Here are ten unique decorative concrete walkway designs to inspire your project:
- Mediterranean Charm: Terracotta and ochre tones with a stamped pattern mimicking terracotta tiles. Incorporate small, mosaic-like pieces of colored glass for added sparkle.
- Modern Minimalism: Sleek, gray concrete with a smooth, polished finish. Use subtle, linear patterns to create a contemporary look.
- Rustic Elegance: Warm browns and tans with a stamped flagstone pattern. Incorporate natural stone borders and low-lying plants.
- Coastal Breeze: Light blues and grays with a textured surface resembling weathered driftwood. Use seashells or small pebbles as accents.
- Geometric Fusion: Bold geometric patterns in contrasting colors (black, white, and bright accent color). Use a smooth finish for a clean look.
- Zen Garden Path: Soft greens and grays with a smooth finish. Incorporate natural stone stepping stones and strategically placed bamboo plants.
- Forest Path: Deep browns and greens with a textured surface mimicking bark or wood. Incorporate natural wood borders and moss.
- Abstract Art: A swirling pattern of various colors and textures, creating a unique and artistic look. This could incorporate multiple colors and textures in a free-flowing design.
- Checkerboard Classic: A classic black and white checkerboard pattern with a smooth finish. This provides a clean and timeless look.
- Twilight Hues: A blend of deep purples, blues, and grays, creating a dramatic and moody walkway, perhaps with a textured surface that mimics night sky patterns.
Final Conclusion

Source: dreamstime.com
Creating a decorative concrete walkway is a rewarding project that significantly enhances your property. By carefully considering the design, choosing appropriate materials, and following proper installation techniques, you can achieve a stunning and long-lasting result. Remember, proper planning and maintenance are key to maximizing the beauty and lifespan of your walkway. So, get inspired, get creative, and transform your outdoor space!